Sink Aerator Clogged? Here’s How to Unclog It in About 10 Minutes
If your kitchen or bathroom faucet suddenly dribbles instead of streams, a sink aerator clogged with mineral scale and grit is the single most likely culprit — not a bad valve, not low household water pressure, and definitely not a reason to call a plumber. The aerator is the small, removable screen-and-housing part screwed onto the very tip of your faucet spout. Because it’s the last thing your water passes through, it catches every fleck of sediment, rust, and calcium in the line. The good news: it’s the easiest faucet repair there is, and you probably already own everything you need to fix it.
Below, we’ll walk through exactly why aerators clog, how to clean one step by step, when soaking won’t cut it, and how to keep it from happening again. We’ll also cover the questions people actually ask us — like whether you can just remove the aerator entirely, and why your water sprays sideways after cleaning.
Why is my sink aerator clogged in the first place?
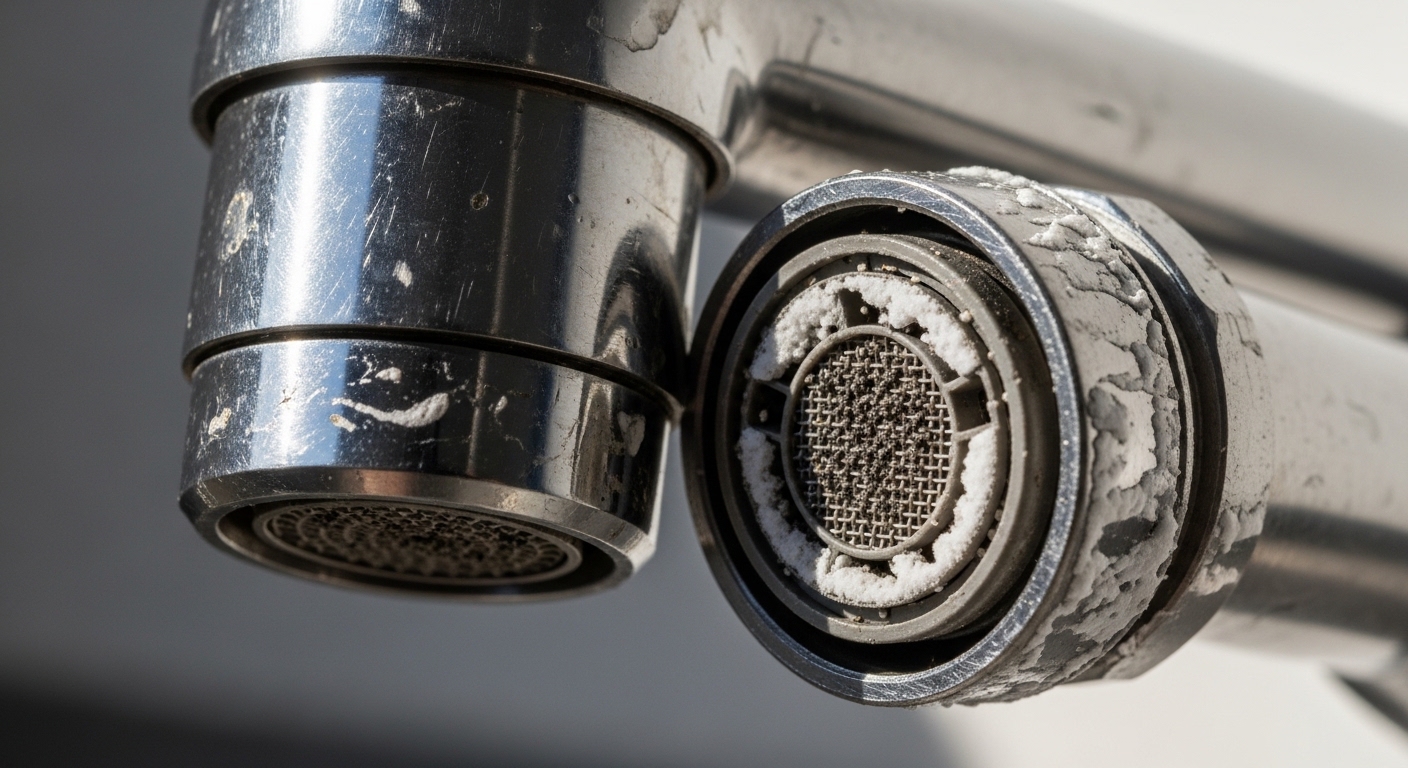
Your aerator is clogged because it’s doing its job — it’s the finest filter in your faucet, so it traps everything the water carries before that water reaches your hands. The three most common blockages are hard-water mineral scale (calcium and magnesium that harden into chalky white crust), sediment and rust flakes shaken loose from your pipes or water heater, and tiny debris left behind after plumbing work.
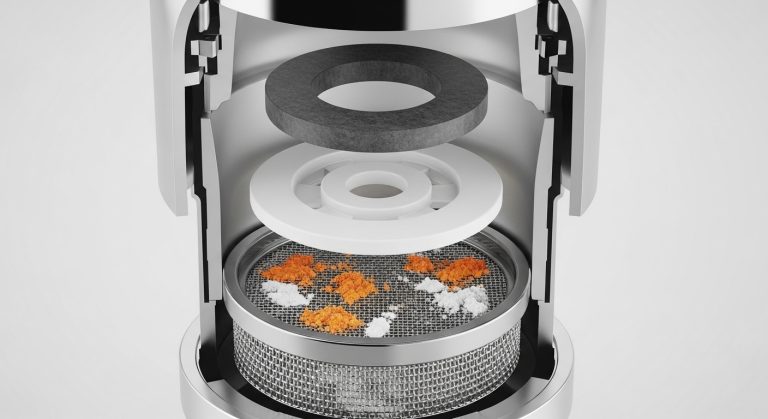
An aerator does two things: it mixes air into the water so the stream feels full without wasting water, and it straightens that stream so it doesn’t splash. To do that, it uses a stack of fine screens and a flow restrictor with very small openings — often smaller than 1 mm. Those small openings are exactly what makes it clog-prone. In hard-water regions (much of the American Southwest, Midwest, and Texas), scale can visibly narrow those openings in a matter of months.
A few telltale signs it’s the aerator and not something bigger:
- The weak flow is only at one faucet. If every faucet in the house is weak, that’s a supply or pressure issue, not an aerator.
- Flow improves when you unscrew the aerator. Take it off and run the faucet — if the stream is suddenly strong (but messy), the aerator is your problem.
- The stream sprays crookedly or splits. A partially blocked screen deflects water sideways.
- You see white crust or specks on the faucet tip or in the removed aerator.
Hard water is the biggest repeat offender, and it’s the same mineral load that leaves spots on your fixtures. If you’re fighting buildup all over the faucet, not just inside the aerator, our guide on how to clean hard water stains from a faucet pairs well with this repair.
How do I unclog a sink aerator step by step?
To unclog a sink aerator: unscrew it from the spout by hand or with tape-wrapped pliers, disassemble the parts and note their order, soak everything in white vinegar for 30–60 minutes, scrub the screen clean, rinse, then reassemble and reinstall. The whole job takes about 10 minutes of hands-on work plus soak time.
Here’s the full process:
- Close the drain first. Put in the stopper or lay a towel over the drain so you don’t lose the tiny washer or restrictor down the pipe.
- Unscrew the aerator. Turn it clockwise-off — meaning toward you when you look up at the spout tip (lefty-loosey from your viewpoint). Try by hand first. If it’s stuck with scale, wrap the aerator in a rag or a few layers of masking/electrical tape to protect the finish, then grip gently with slip-joint pliers or an adjustable wrench.
- Lay out the parts in order. Inside you’ll typically find the outer housing, one or more mesh screens, a plastic flow restrictor, and a rubber washer/O-ring. Line them up on a paper towel exactly as they came out so reassembly is foolproof.
- Rinse and inspect. A quick backward rinse under the tap dislodges loose grit. Hold the screen up to the light — you’ll see where scale is blocking the holes.
- Soak in white vinegar. Drop all the metal and plastic parts into a small cup of undiluted white vinegar for 30–60 minutes. Vinegar’s acetic acid dissolves calcium scale. For heavy buildup, warm the vinegar slightly (not boiling) to speed it up.
- Scrub. Use an old toothbrush and, for stubborn holes, a straight pin or safety pin to poke individual openings clear. Don’t use anything metal-hard on the screen itself — bent mesh sprays crooked.
- Rinse thoroughly under running water to flush loose debris and vinegar residue.
- Reassemble and hand-tighten. Stack the parts back in the same order, screw the aerator on clockwise (from your viewpoint, righty-tighty), and snug it hand-tight plus a gentle nudge with the taped pliers. Overtightening cracks the washer and causes leaks.
- Test. Run warm and cold water. The stream should be full, straight, and quiet.
If, after all this, water still leaks or drips from the base of the spout rather than the aerator tip, that’s a different repair — usually a worn washer or cartridge higher up in the faucet. Our walkthrough on how to fix a dripping faucet at home covers that scenario.
What household products dissolve the mineral buildup fastest?
White vinegar is the go-to because it’s cheap, safe on chrome and stainless, and dissolves calcium scale reliably. For very stubborn buildup, a commercial descaler (CLR, Lime-A-Way) works faster, but you must rinse thoroughly and never use it on brushed, oil-rubbed, or PVD-coated finishes without checking the label. Here’s how the common options stack up:
| Cleaner | Best for | Soak time | Finish safety | Cost |
|---|---|---|---|---|
| White vinegar | Everyday calcium scale | 30–60 min | Safe on almost all finishes | ~$3 / gallon |
| Warm vinegar + baking soda paste | Crusty, visible buildup | 20–40 min | Safe; mild abrasive — scrub gently | ~$4 |
| CLR / Lime-A-Way | Severe, months-old scale | 2–5 min only | Check label; avoid brushed/oil-rubbed finishes | ~$6 |
| Lemon juice (citric acid) | Light buildup, no vinegar smell | 45–60 min | Safe on all finishes | ~$2 |
A quick warning on finishes: harsh descalers can strip the coating on specialty finishes. If you have a brushed nickel or matte faucet, stick with vinegar or citric acid — we get into finish durability in our piece on whether brushed nickel faucets are worth it. When in doubt, vinegar is the safe default.
Can I just remove the aerator and leave it off?
You can run the faucet without the aerator, and it will work — but you’ll notice heavier splashing, a harsher stream, and higher water use, because the aerator is what softens the flow and saves water. It’s fine as a short-term test to confirm the clog, but don’t leave it off permanently. Modern aerators cap flow at around 1.5–2.2 gallons per minute (GPM); without one, a kitchen faucet can gush 4+ GPM, wasting water and money. If yours is cracked or corroded beyond cleaning, replace it rather than skip it.
Why does my faucet spray sideways after I cleaned the aerator?
Sideways or split spray after cleaning almost always means the screens were reassembled in the wrong order, installed upside down, or a screen got bent. Take the aerator back off, check that the flat mesh side faces the water flow and the parts sit flat and centered, and make sure no washer is pinched. If a screen is visibly warped, replace just that insert — they’re sold in cheap multi-packs.
How often should I clean my sink aerator to prevent clogs?
Clean your aerator every 3–6 months if you have hard water, or once a year if your water is soft. It’s a five-minute maintenance task that prevents the slow flow decline most people don’t notice until it’s bad. A good habit: clean it the same weekend you descale your shower head or wipe down hard-water spots on your fixtures.
To slow buildup between cleanings:
- Wipe the spout tip weekly to keep scale from creeping into the aerator threads.
- Consider a whole-home water softener if your water hardness is above ~7 grains per gallon — it protects every fixture, not just this one.
- Flush new plumbing. After any pipe or valve work, remove the aerator and run the line for 30 seconds to blow out debris before reinstalling.
- Add point-of-use filtration. A faucet filter reduces sediment reaching the aerator; see our overview of the faucet water filter hose to understand how those setups work.
When should I replace the aerator instead of cleaning it?
Replace the aerator when the housing is cracked, the threads are stripped, the metal is corroded green or pitted, or the flow is still weak after a thorough vinegar soak and scrub. Aerators are inexpensive — usually $5–$12 — and standardized, so replacement is genuinely easier than fighting a corroded one.
The one thing to get right is size. Aerators come in a handful of standard thread sizes, and they mount either male (threads on the outside of the aerator) or female (threads inside). Here’s a quick reference:
| Aerator type | Where threads are | Common size | Typical faucet |
|---|---|---|---|
| Male / regular | Outside of aerator | 15/16″ (M24 metric) | Most standard kitchen/bath |
| Female | Inside of aerator | 55/64″ (M22) | Many bathroom faucets |
| Junior / small | Varies | 13/16″ | Compact bar & prep faucets |
| Cache / hidden | Recessed, needs a key | Brand-specific | Modern pull-down faucets |
The simplest way to buy the right one: take your old aerator to the hardware store and match it, or note your faucet’s brand and model. If you’re already thinking about upgrading the whole faucet rather than nursing an old one along, our guide on how to choose the right bathroom faucet will point you in the right direction.
Does a clogged aerator affect hot and cold water differently?
Sometimes, yes. If only your hot water is weak, the debris may be scale flaking out of your water heater, and it can collect more on the hot side. If both hot and cold are equally weak at that faucet, it’s a straightforward aerator clog. Persistent hot-only problems after cleaning point to sediment in the water heater — worth flushing the tank.
A quick word on doing this the right way
None of this requires shutting off your water supply, since the aerator is downstream of the valve — but do close the drain, and do protect the finish before you touch it with any tool. The most common mistakes we see are overtightening (which cracks the washer and causes drips) and using a harsh descaler on a delicate finish (which dulls it permanently). Go gentle, and this repair is genuinely hard to mess up.
Author note: This guide was written by the Afinion Home fixtures team, drawing on hands-on bench testing of aerators across chrome, brushed nickel, and matte black finishes, plus years of fielding real customer repair questions. Afinion Home designs and sells faucets and bathroom fixtures direct to homeowners, and every faucet we ship uses aerators that meet the U.S. EPA WaterSense flow standard (≤1.5 GPM for bathroom, ≤1.8 GPM for kitchen) and carry a limited lifetime warranty on the finish and function. If your faucet is one of ours and cleaning doesn’t restore flow, a replacement aerator is covered — reach out before you buy a generic one.
FAQ
How do I know if my sink aerator is clogged or if it’s a bigger plumbing problem?
Unscrew the aerator and run the faucet. If the flow is suddenly strong (even if splashy), the aerator was the clog. If it’s still weak with the aerator off, the problem is upstream — a supply line, shut-off valve, or cartridge — and worth a closer look.
Can I clean a sink aerator without removing it?
You can do a partial job by tying a bag of vinegar around the spout so the aerator soaks in place, and it helps for light scale. But removing it is far more effective because you can scrub the screens directly and clear each opening. Removal takes under a minute and is worth it.
Will vinegar damage my faucet or aerator?
No. White vinegar is safe on chrome, stainless, and the plastic and rubber inside an aerator. Just don’t leave polished or specialty finishes soaking for many hours, and rinse well afterward. Avoid stronger acids and commercial descalers on brushed, matte, or oil-rubbed finishes.
My aerator is stuck and won’t unscrew. What now?
Wrap it in tape or a rag to protect the finish, then grip with slip-joint pliers and turn steadily. If it’s frozen with scale, apply a vinegar-soaked cloth around it for 15–20 minutes to soften the buildup, then try again. Turn toward you (lefty-loosey from below) — forcing it the wrong way can strip the threads.
How much does it cost to fix a clogged sink aerator?
Cleaning it costs essentially nothing — a splash of vinegar you already own. If you need a replacement aerator, expect $5–$12 at any hardware store. A plumber isn’t necessary for this repair, which is why we always recommend trying the 10-minute cleaning first.
Why does my water pressure drop again a few weeks after cleaning?
Fast re-clogging means either very hard water depositing scale quickly, or ongoing sediment from pipes or a water heater. Clean more frequently (every couple of months), consider a water softener or a point-of-use filter, and if it’s hot-water-only, flush your water heater to clear settled sediment.